
Reviewed · EVEREST BASE CAMP TREKS
Gokyo to Everest Base Camp Trek
Gokyo to Everest Base Camp is altitude heavy. I love the Gokyo Lakes for those wide, high-altitude views and I love the Cho La Pass crossing for the wild, glaciated feeling. The tradeoff is the schedule: you start before sunrise a couple times, and one night near the pass is pretty basic.
This trek is also run like a proper expedition logistics plan for a small group, with a licensed English-speaking guide and 1 porter for every two clients. You’re not just hiking, you’re moving through a chain of altitude steps with real support, so you can focus on pacing and staying safe.
In This Review
- Key Highlights You Should Know Before You Go
- Everest Circuit in Practical Terms: Why This Route Feels Like Two Treks
- Price and Logistics: What $2,200 Really Buys You
- Day 1 in Kathmandu: The Soft Landing Before the Hard Part
- Day 2: The Lukla Flight and First Steps to Phakding
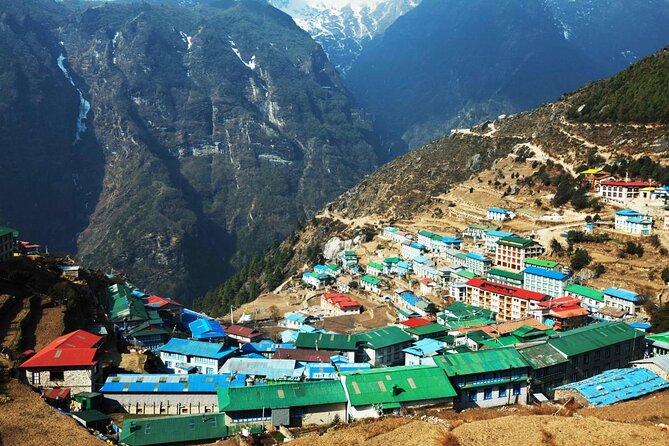
- Day 3: Dudh Kosi Bridges to Namche Bazaar (Sagamartha National Park Entry)
- Day 4: Namche Acclimatization Day and Sherpa Culture
- Day 5: Phortse, Rhododendron Color, and Steady Climbing
- Day 6: Machhermo and the Ngozumpa Glacier Feeling
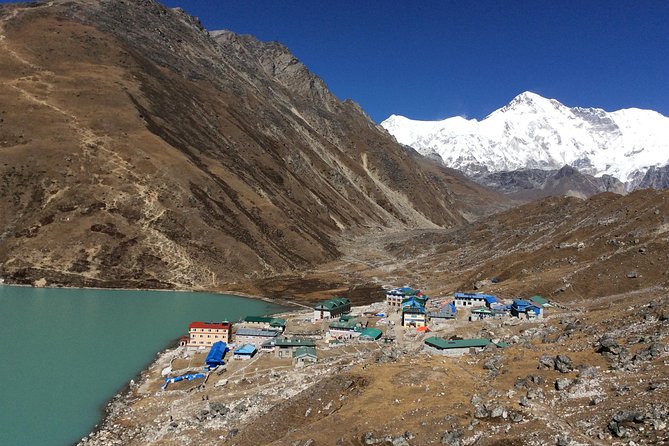
- Day 7: Arrive at Gokyo (Your Base for Two Nights)
- Day 8: Gokyo Ri at 5,483 m for Wide Views
- Day 9: Thangnag and the Reality of Basic Dorm Rooms
- Day 10: Cho La Pass Crossing, Timing Before Weather
- Day 11: Lobuche and the Build-Up to Everest Base Camp
- Day 12: Everest Base Camp at 5,365 m
- Day 13: Kala Patthar at 5,555 m for Peak Views
- Day 14: Descent Through Pangboche and Tengboche Back to Namche
- Day 15: Final Trek to Lukla, Then Back to the Main World
- Day 16 and 17: Kathmandu Flight Back and Airport Drop-Off
- Guides, Porters, and Real Safety-First Decision Making
- What to Pack (Since Personal Gear Is Not Included)
- Should You Book This Gokyo to Everest Base Camp Trek?
- FAQ
- How long is the trek?
- Where does it start and end?
- What is included in the trek price?
- Do I need to bring my own sleeping bag and down jacket?
- What meals are included?
- How high do you go?
- What kind of lodging should I expect on the trek?
- Are there porters and a guide?
- What happens if the trek is canceled due to poor weather?
- How does cancellation work if I need to change plans?
Key Highlights You Should Know Before You Go
- Gokyo Lakes and Gokyo Ri give you the classic Everest-region panoramas without only “staring at Everest from one spot.”
- Cho La Pass at about 5,300 m adds a real adventure element beyond the usual Everest Base Camp routes.
- Acclimatization in Namche Bazaar before pushing higher helps you move smarter through thin air.
- Everest Base Camp and Kala Patthar deliver the closest views to Everest you can get without mountaineering gear.
- Filtered water and included sleeping bag and down jacket take pressure off your packing list.
Everest Circuit in Practical Terms: Why This Route Feels Like Two Treks
This is the Everest Circuit idea, but built with a very specific twist: you don’t just go to Everest Base Camp. You also go to Gokyo, cross Cho La, and time your big viewpoints for when the sky might actually cooperate.
I like that this route balances drama with rhythm. You get suspension bridges and river valleys early on, then it steadily turns into high, cold walking. The Gokyo side is especially appealing if you want something a little less one-note than the standard Everest path, because the views expand in different directions and the lakes change the whole mood of the trek.
Your main consideration is effort and timing. The altitude is real and the days near Cho La and Kala Patthar are demanding. Add in cold mornings and early starts, and you’ll want to be the type of traveler who’s okay with structured days and simple evenings.
More Treks in Kathmandu
- Everest Base Camp Trek – 14 Days
★ 5.0 · 1,499 reviews - Everest Base Camp Trek
★ 5.0 · 842 reviews - Everest Base Camp Trekking
★ 5.0 · 485 reviews
Price and Logistics: What $2,200 Really Buys You
At $2,200 per person, this trek is not cheap, but it’s not just a ticket for walking either. The value is in what they handle for you:
- Kathmandu lodging (three-star, twin-share or double) for 2 nights
- Trek accommodations for 14 nights (guest houses in Lukla, Phakding, Namche, plus onward)
- Kathmandu to Lukla and back airfare
- Licensed English-speaking trekking guide
- Permits for the trek
- Porter support (1 porter per every 2 clients)
- Down jacket and sleeping bag for the trek, to be returned
- A Katadyn Pocket Water Filter for filtered water on the trails
- Meals included on trek days (lunch and dinner for 14 days, plus breakfast for 16)
- Airport transfers in Kathmandu
- Included trekking kit items like the duffel or kit bag and sun hat
What you should notice is the structure. This is a “crew plus gear plus permits” package, which matters on Everest terrain where delays and cold can snowball quickly. You still need personal gear, and you do need to plan for the altitude, but you’re not carrying every administrative task on your own.
Also, your group size is capped at 15, and that tends to keep things from turning into a chaotic slog. Still, small groups only help if you bring a cooperative attitude, because the trek works best when everyone follows timing and pace guidance.
Day 1 in Kathmandu: The Soft Landing Before the Hard Part
Your first day is straightforward: you’re met at Tribhuvan International Airport in Kathmandu, then taken to your hotel with airport transfer included.
I like having that day and the next one in place because Kathmandu is where you handle the essentials: sorting out any last gear gaps, doing a quick logistics check, and letting the shock of travel settle. You’ve got 2 nights in a three-star hotel here, which is a big deal when you know you’re about to sleep at altitude in simpler rooms.
If you’re the type who hates uncertainty, use this first Kathmandu window to confirm your packing, especially warm layers, gloves, and anything you’ll want for early morning starts.
Day 2: The Lukla Flight and First Steps to Phakding
The first big milestone is the flight from Kathmandu to Lukla, about 35 minutes, landing at Tenzing and Hillary Airport (around 2,804 m). Then your guide handles the briefing and you start trekking toward Phakding.
Lukla days are always about transition. You’re jumping into altitude quickly, then you’re walking with river crossings and prayer-flag energy. Phakding is one of those foothill base points where you can start moving without immediately feeling like every step is a battle.
A practical note: flight timing and weather are real factors in this region. Even though your trek has a clear plan, you should expect that the day you arrive might feel more “logistics first” than “nature first.”
More Everest Base Camp treks:
- Everest Base Camp Helicopter Tour landing at Everest View Hotel
★ 5.0 · 668 reviews - Everest Base Camp Trekking – 13 Day
★ 5.0 · 365 reviews - Everest Base Camp Trek
★ 5.0 · 350 reviews - Everest Base Camp Trek -14 Days
★ 5.0 · 321 reviews
Day 3: Dudh Kosi Bridges to Namche Bazaar (Sagamartha National Park Entry)
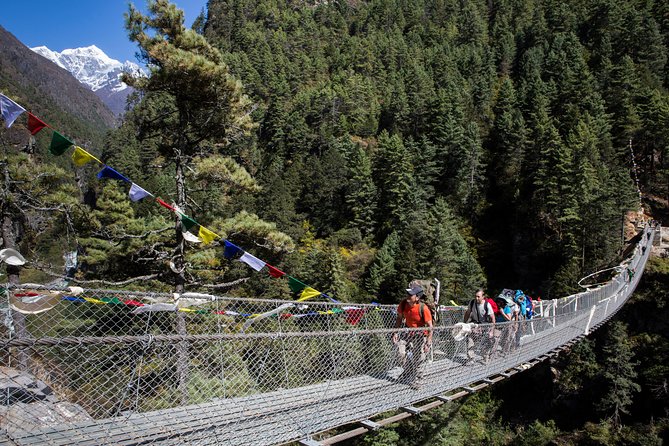
Today’s walking runs along the Dudh Kosi River, with lots of suspension bridges. Prayer flags line the route, and the constant river crossings are part of what makes this day feel like you’re in motion all the time.
You’ll also enter Sagamartha National Park. That matters for two reasons. One, you’re now in the protected heart of the Everest region. Two, it’s a reminder that this trek is tightly managed, from permits to trail planning.
Namche Bazaar is your next altitude jump. Even if the day feels “doable,” thin air starts to creep in, so you’ll want to keep your pace steady and avoid the urge to sprint ahead early. Save the energy for the acclimatization day coming next.
Day 4: Namche Acclimatization Day and Sherpa Culture
This is your reset day in Namche Bazaar, designed for acclimatization and adjustment to thinner air. Instead of just hiking higher, you spend time at altitude and learn the local context.
The route includes a short trek to a museum with Sherpa customs and traditional life exhibits. I like days like this because they help you understand why this area is more than a view stop. You’re walking through Sherpa territory and culture, and that background makes the trek feel more meaningful instead of just physically hard.
One thing to plan: use this day for good hydration and smart snacking. You don’t need to “work out,” you need your body to get used to altitude.
Day 5: Phortse, Rhododendron Color, and Steady Climbing
You climb steeply out of the valley through rhododendron forest. As you gain elevation, you’ll start noticing changes in vegetation, and the air gets sharper and drier.
This day runs through areas like Yak Kha… and continues toward Phortse. The point here is progression: you’re moving into higher valleys where the air feels cooler and the walking becomes more technical in your mind, even when the trail itself is simple.
Phortse typically feels quieter than Namche, which can be a welcome change. Still, remember you’re building for the higher days, so don’t turn this into a race.
Day 6: Machhermo and the Ngozumpa Glacier Feeling
Machhermo is one of those camps where the views start to feel bigger and more permanent. The walk includes a ridge for an outlook both down toward Kengtega and up toward Cho Oyu, then a descent toward a river and another climb toward the terminal moraine of the Ngozumpa glacier.
This is a key day because it sets up your mental shift from “valley trekking” to “glacier-region trekking.” Once you’re used to thinking in those terms, the next days make more sense.
If weather is clear, you’ll feel like you’re walking through a giant open-air diagram. If clouds roll in, it can feel like a cold fog treadmill. Either way, keep layers on hand.
Day 7: Arrive at Gokyo (Your Base for Two Nights)
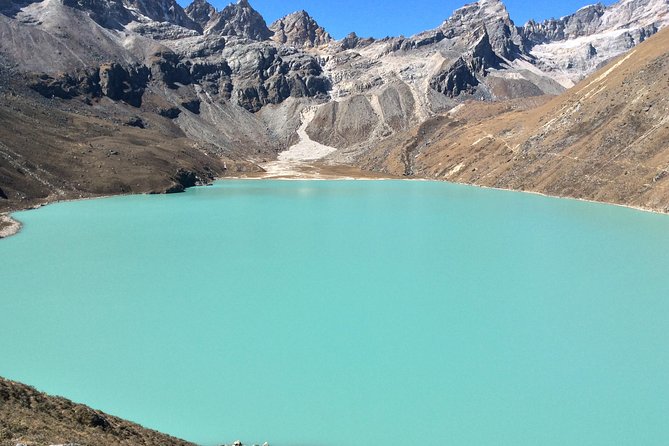
You reach Gokyo at about 4,790 m and make camp for 2 nights. This is where the trek’s signature payoff starts. Gokyo is often the moment people realize they’re not just doing Everest. They’re doing a whole high-altitude basin system.
From here, you’re positioned for day trips around the area. That matters, because it means you’re not constantly changing camps on every single day. You get a little breathing room, and it makes the altitude feel more manageable.
Day 8: Gokyo Ri at 5,483 m for Wide Views
Early on this day, you climb steeply to the top of Gokyo Ri, about 5,483 m. The climb time is listed as 30 minutes, but plan on it feeling longer because altitude makes everything slower. Still, this is one of the days with real rewards.
You’re looking for big, high panoramas over the super Gokyo valley and the giant peaks around you. This is also one of those viewpoints where sunrise timing can make a huge difference, so follow your guide’s advice on when to go and how to dress.
Practical tip: keep moving steadily. Don’t stop every 30 seconds because you feel out of breath. If you need breaks, take short ones and keep warm.
Day 9: Thangnag and the Reality of Basic Dorm Rooms
You trek toward the foot of Cho La pass, reaching Thangnag. This stop is described as remoteness with very basic accommodation, dormitory-based rooms.
I appreciate when operators are honest about this. You should go in with the right expectations: less comfort, more focus on sleep quality and recovery. Your body will benefit more from warm layers and a good night’s rest than from chasing comfort.
This is also a “gear check” day. Make sure your essentials are ready for a very early morning crossing.
Day 10: Cho La Pass Crossing, Timing Before Weather
You start walking before sunrise, usually 4:00 or 5:00 am, to reach the pass by 9:00 or 10:00 am. The goal is clear: avoid the worst of afternoon weather.
The pass crossing happens around 5,300 m. That altitude, plus cold exposure and changing conditions, is why timing is everything here. When you’re on the trail early, you’re dealing more with controlled cold than with unpredictable gusts and visibility issues later.
After crossing, you continue down toward the next camp. This is a classic “up and over and down again” mountain day, so pack for temperature swings and treat the descent carefully.
Day 11: Lobuche and the Build-Up to Everest Base Camp
You walk to Lobuche via a shorter, easier route. That matters because you have your big day ahead: Everest Base Camp.
Lobuche is where the Everest excitement starts turning from general awe into a specific mission. This is the day to keep your energy controlled. Eat what you can, hydrate, and try to rest. Even when a day feels easier on paper, altitude still taxes you.
Also, check that you have what you need for the glacier walk tomorrow. Cold hands and stiff fingers can ruin your day if you’re not ready.
Day 12: Everest Base Camp at 5,365 m
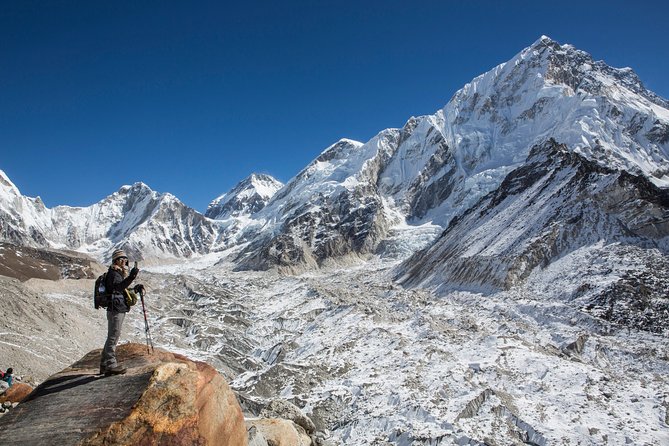
Today is a big one: the walk to Everest Base Camp at about 5,365 m along the Khumbu Glacier.
This is the closest point you can reach in this region without mountaineering equipment. Expect a mix of physical effort and mental overload, because you’re stepping into the visual world of Everest operations and glacier terrain.
Whether skies are clear or hazy, the experience is defined by scale. Glacier walking can be slow and demanding in cold. Follow your guide’s pace, keep your footing calm, and don’t let excitement push you faster than your body can handle.
Day 13: Kala Patthar at 5,555 m for Peak Views
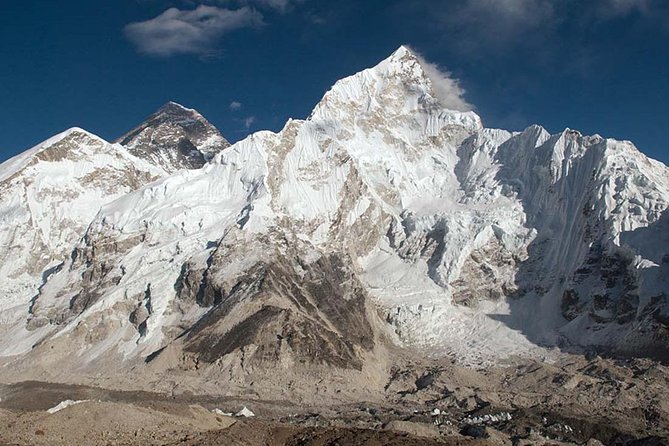
Kala Patthar is often treated as the big finishing viewpoint day, and this route follows that pattern. You climb to around 5,555 m and it’s described as one of the most difficult yet rewarding days.
This ascent is demanding, but that’s where the payoff happens. Kala Patthar gives you that “I can see Everest and the surrounding giants clearly” feeling. It’s also usually timed for the best possible visibility window, so early start and warm clothing are non-negotiable.
If you’ve been conserving energy, this is the day it cashes in.
Day 14: Descent Through Pangboche and Tengboche Back to Namche
After the big viewpoint climb, you begin descending. This is one of those days where your legs still work hard, but your sense of altitude changes. You pass through Pangboche and Tengboche, both linked to the region’s monastery culture, before continuing on to Namche Bazaar.
I like descent days because they help you regain a sense of control. Your breath feels easier, but you still need to watch your knees and ankles. Take downhill slower than you think you need to.
Namche again in the afternoon means you get a return to a more established town setting. It’s not a vacation day, but it’s a mental breather.
Day 15: Final Trek to Lukla, Then Back to the Main World
You trek back to Lukla, the place where your trek began. This last day is about reflecting as a group and recognizing that the mountain has done its job.
Your afternoon is listed as free, which usually means time for wandering, stretching, and settling your gear. You’re also right at the point where you’ll appreciate any support your guide provides with the flight plan.
Day 16 and 17: Kathmandu Flight Back and Airport Drop-Off
The scenic flight returns you to Kathmandu after about 35 minutes, and you’re transferred back to your hotel on arrival. Your final day ends with an airport representative dropping you at Tribhuvan International Airport for your departure.
If you’re coming from a cold, high-altitude environment, your body might still feel off, even if you’re “done” with the trek. Use these days to eat properly and keep moving gently.
Guides, Porters, and Real Safety-First Decision Making
The human part is huge on this trek. You’ll have a licensed English-speaking trekking guide and porter support, plus filtered water and included high-cold gear.
From past trekkers’ accounts, guides such as Nima, Raj N, Raj Kumar, Ramesh, and Lakpa Sherpa stand out for flexibility when snow and weather shift plans. That matters because on Everest routes, one decision can change the day: when to push, when to adjust timing, and when to keep it conservative.
Porters like Biroj and Sonam are also frequently praised for strength and steady support. With 1 porter for every two clients, you’re not carrying everything, which helps you keep your pace and avoid getting weighed down when the altitude hits.
Your best strategy is simple: listen to your guide, communicate honestly about how you’re feeling, and don’t treat discomfort as something to ignore. This is the kind of trek where survival is boring, and good decisions are what make it safe.
What to Pack (Since Personal Gear Is Not Included)
Down jacket and sleeping bag are provided for the trek and returned, but personal trekking equipment is not included. So you still need to show up prepared.
Pack for cold mornings and temperature swings:
- Layered clothing you can adjust quickly
- Warm hat and gloves
- Sunglasses and sunscreen (high altitude sun is intense)
- A headlamp for early starts
- Trekking boots and socks you trust
- A small daypack and essentials for trail water and snacks
Bring a calm mindset too. Guest house nights in higher camps may not be the kind of sleep you’re used to, so treat sleep like a resource you manage.
Should You Book This Gokyo to Everest Base Camp Trek?
If you want the full Everest region experience without a one-dimensional route, this is an easy yes. You get Gokyo, Cho La, Everest Base Camp, and Kala Patthar in one coordinated loop, with acclimatization built in and strong support from guide and porters.
I’d be cautious if you’re not comfortable with early-morning starts and basic accommodations near remote areas like Thangnag. This trek asks for real stamina and a willingness to follow timing, especially around Cho La Pass.
One more practical point: the trek is weather dependent. If it’s canceled due to poor weather, you should expect a different date or a full refund.
FAQ
How long is the trek?
The experience runs for about 17 days.
Where does it start and end?
It starts in Kathmandu at Tribhuvan International Airport and ends back at the same meeting point in Kathmandu.
What is included in the trek price?
Included items cover airport transfers, Kathmandu hotel for 2 nights, guest house accommodation for 14 nights, a licensed English-speaking guide, 1 porter for every two clients, permits, down jacket and sleeping bag (returned after), Kathmandu to Lukla and back airfare, filtered water using a Katadyn pocket filter, selected meals during the trek, and some trekking kit items like a duffel or kit bag and sun hat.
Do I need to bring my own sleeping bag and down jacket?
No. A down jacket and sleeping bag are provided for the trek and returned.
What meals are included?
Lunch and dinner are included for 14 days, and breakfast is included for 16 days. Meals in Kathmandu are not included.
How high do you go?
You pass major high points including Gokyo Ri at about 5,483 m, Cho La Pass at about 5,300 m, Everest Base Camp at about 5,365 m, and Kala Patthar at about 5,555 m.
What kind of lodging should I expect on the trek?
You stay in guest houses on the trek. One night near the pass (Thangna/Thangnag) is described as very basic with dormitory-based rooms.
Are there porters and a guide?
Yes. The trek includes a licensed English-speaking trekking guide and a porter for every two clients.
What happens if the trek is canceled due to poor weather?
If it’s canceled due to poor weather, you’ll be offered a different date or a full refund.
How does cancellation work if I need to change plans?
You can cancel up to 6 days in advance of the experience for a full refund. Shorter notice changes the refund amount or may result in no refund, based on the stated cancellation windows.
More Gokyo Lakes treks
- Everest Base Camp – Cho La Pass – Gokyo Trek
★ 5.0 · 65 reviews - Everest Gokyo Valley Trek – 12 days
★ 5.0 · 27 reviews - Landing Private Helicopter at Everest base camp & Gokyo for photo
★ 5.0 · 20 reviews - Gokyo Valley Trek
★ 5.0 · 19 reviews
Latest additions near Kathmandu
- Traditional Momo Making Class★ 5.0 · 10 reviews
- White Water River Rafting – 1 Day★ 4.3 · 3 reviews
- Kathmandu to Pokhara Premium sofa bus ticket★ 4.0 · 17 reviews
- Ghorepani Poon Hill Trek★ 5.0 · 16 reviews
- Amazing 1 Day Trekking Experience in Kathmandu Nepal★ 5.0 · 24 reviews
- Ghorepani Poonhill Trek★ 5.0 · 5 reviews
- Walking tour of real Kathmandu through back streets.★ 5.0 · 3 reviews
- Wildlife Adventure in Chitwan Nepal★ 4.0 · 4 reviews
Everest Base Camp Treks, compared.
Everest Base Camp Helicopter Tour landing at Everest View Hotel
Read our review →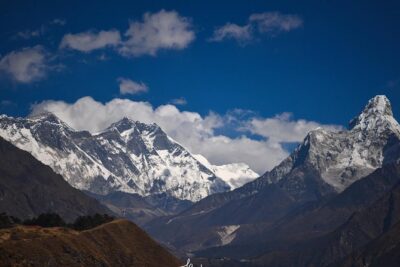
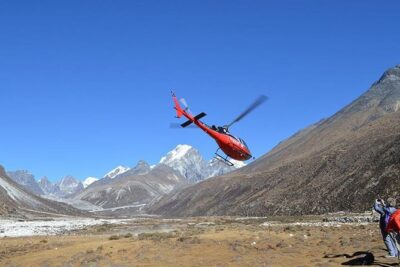
Everest Base Camp Helicopter Tour landing at Hotel Everest View
Read our review →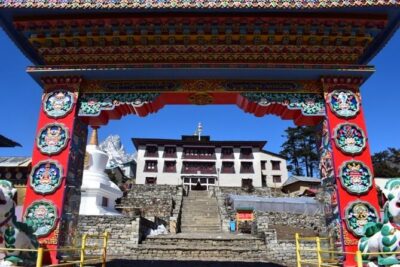
Browse the lists this tour appears in